Initially, if you’ve played CS:GO recently and got an alert saying that the VAC system was unable to verify your gaming session , this is your complete guide to fix it.
Error: VAC system was unable to verify your gaming session
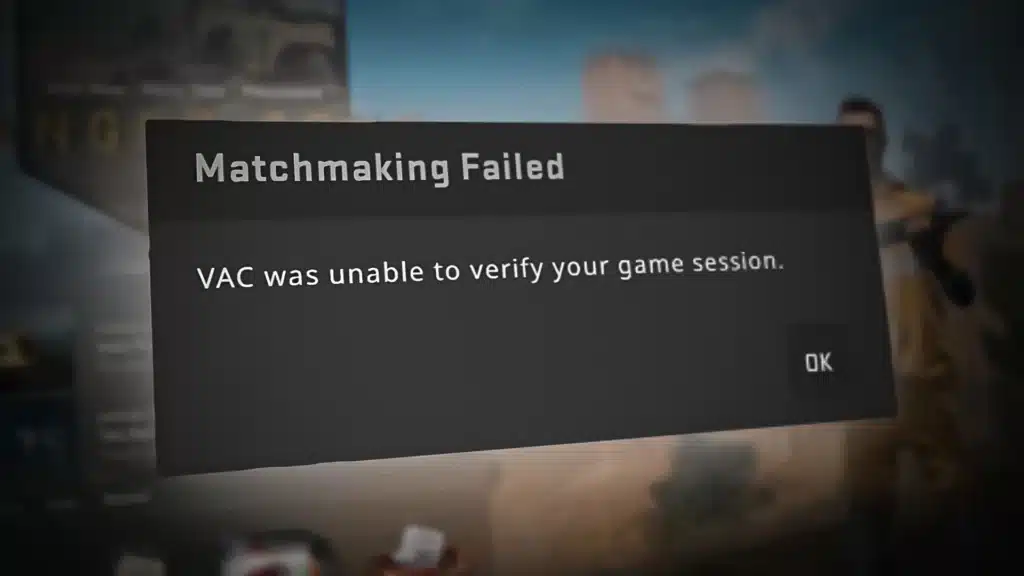
What is the VAC system cannot verify session and why does it happen?
This is a common error for Counter Strike Global Offensive players around the world and its probable cause is related to some internal communication failure between Steam, installed on the player’s computer, and the servers.
How to solve
Many will see the word VAC and assume they’ve been banned, but we can assure you this is just a bug and you haven’t been put on the shelf. This glitch is usually fixed after completing Method 1 , but in some rare circumstances you will need to try Method 2 and 3 . In short, you will see further below, in this article:
- Method 1 – Checking the game files;
- Method 2 – Clearing the download data (cache);
- Method 3 – Backup configs (with file path), reinstall CSGO, restart router and computer.
Below is the step by step and, below, the video tutorial teaching how to solve this VAC error in CSGO:
Method 1: Verifying game files
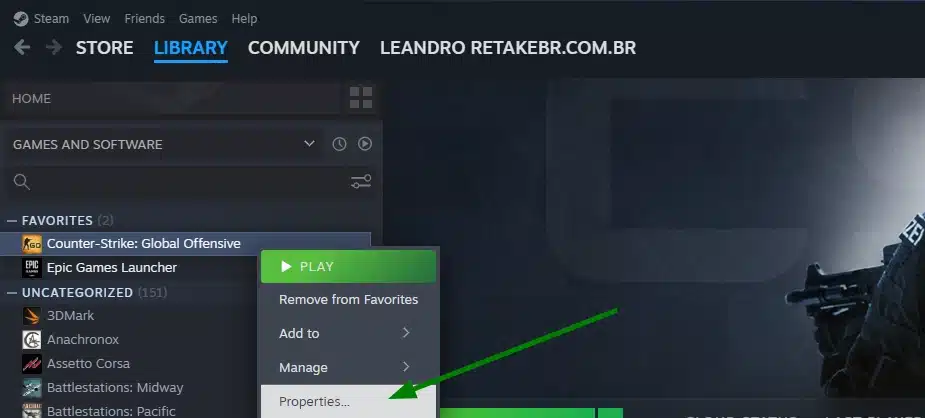
- Find Counter-Strike: Global Offensive in your Steam Library ;
- Right-click on the game and open Properties;
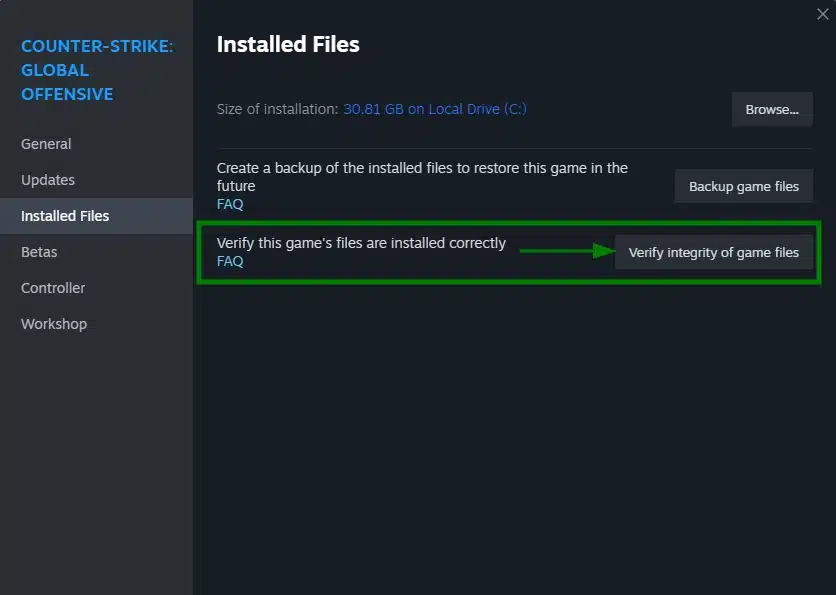
- Click Installed Files ;
- Finally, click Verify integrity of game files and wait for it to complete.
- After the process is complete, we recommend restarting your computer and router . Then test that the error about vac cannot verify your cs go session no longer occurs.
- However, as stated earlier, in some rare circumstances, the problem may still be present after trying Method 1, so you will have to try Methods 2 and 3.
Method 2: Clear download data (cache)
This method consists of clearing the steam download data cache and is simple to do!
- Open steam, click View and then Downloads:
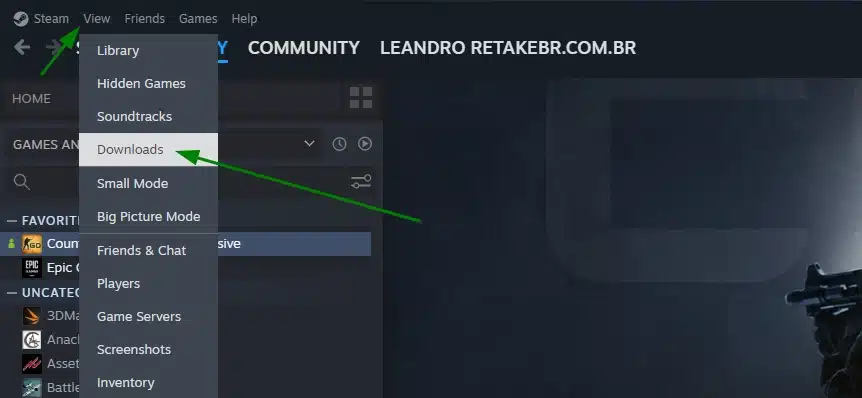
- On the next screen, click on the settings gear (1) , click on Downloads (2) and finally on Clear download data (3) and confirm with OK.
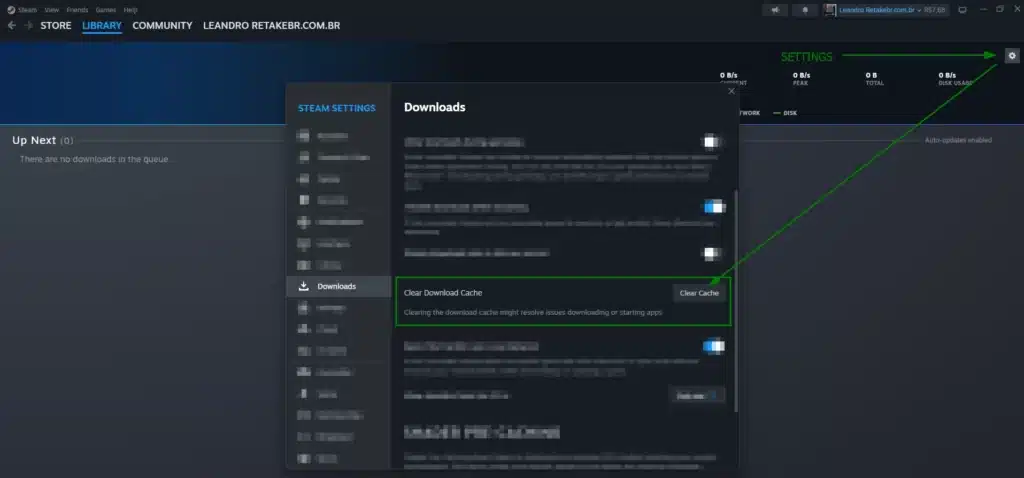
- If you haven’t restarted your router yet, now is the time to do so. Take the opportunity to close steam and open it again before testing.
- Finally, set the correct date and time on your computer and test again.
Method 3: Backup configs and reinstall CSGO
Reinstalling CSGO will erase all your game settings, so we recommend taking a screenshot of your settings before using this method. This method always fixes the problem, but it usually takes longer to complete depending on your Internet connection.
CS:GO CFG backup (path)
- We recommend backing up your CFG if you have customizations like sensitivity, crosshair (crosshair) and other things (except video! This one you need the print anyway)
C:\Program Files (x86)\Steam\userdata\XXXXXXXX\730\local\cfg\config.cfg
Note: The number in green varies according to the steam that is logged in. Therefore, if you are logged into more than one steam account, more than one number will be displayed.
Reinstalling from CS:GO
- Find Counter-Strike: Global Offensive in your Steam Library ;
- Right-click the game and hover over Manage ;
- Click Uninstall .
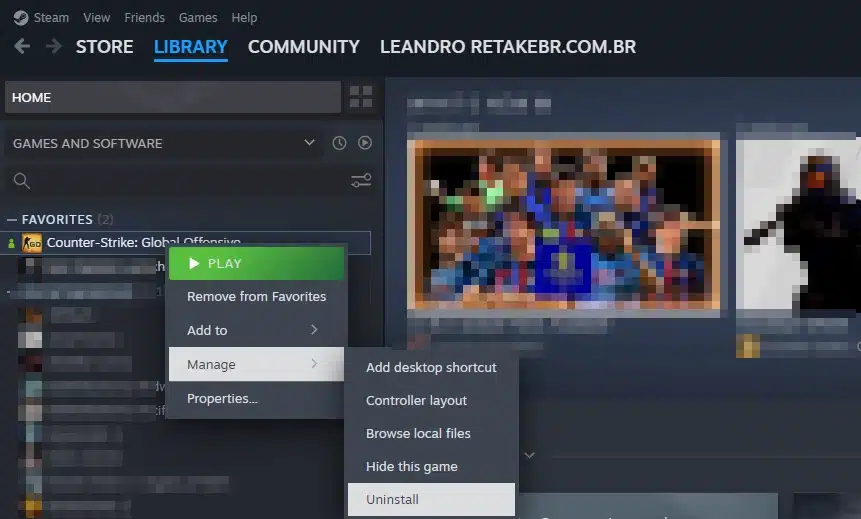
- A verification window will appear. To confirm the uninstall, click Uninstall
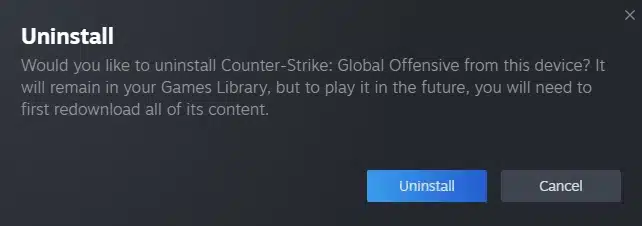
- Finally, install it again and do a new test, recovering the config file in the same place where you copied it (it is necessary to open CS:GO once to create the folder where you will recover the cfg file)
Conclusion: VAC cannot verify session has been fixed!
These were the complete three procedures that taught you how to fix the error message VAC could not verify your game session for good.
We hope you found our guide helpful and that we were able to resolve the issue. However, if the problem persists that the VAC could not verify your game session, evaluate possible installed programs such as a firewall, anti virus… usually recently installed programs, as they may be related to the cause.
Now that you’ve solved the vac error, get free credits on the best sites!


